How to Photograph from a Kayak
Award winning outdoor and wildlife photographer Vanessa Dewson reveals everything you need to know to take fantastic photos from your kayak.
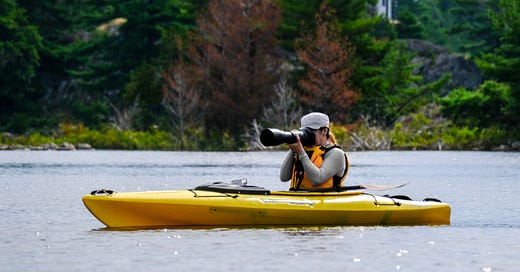
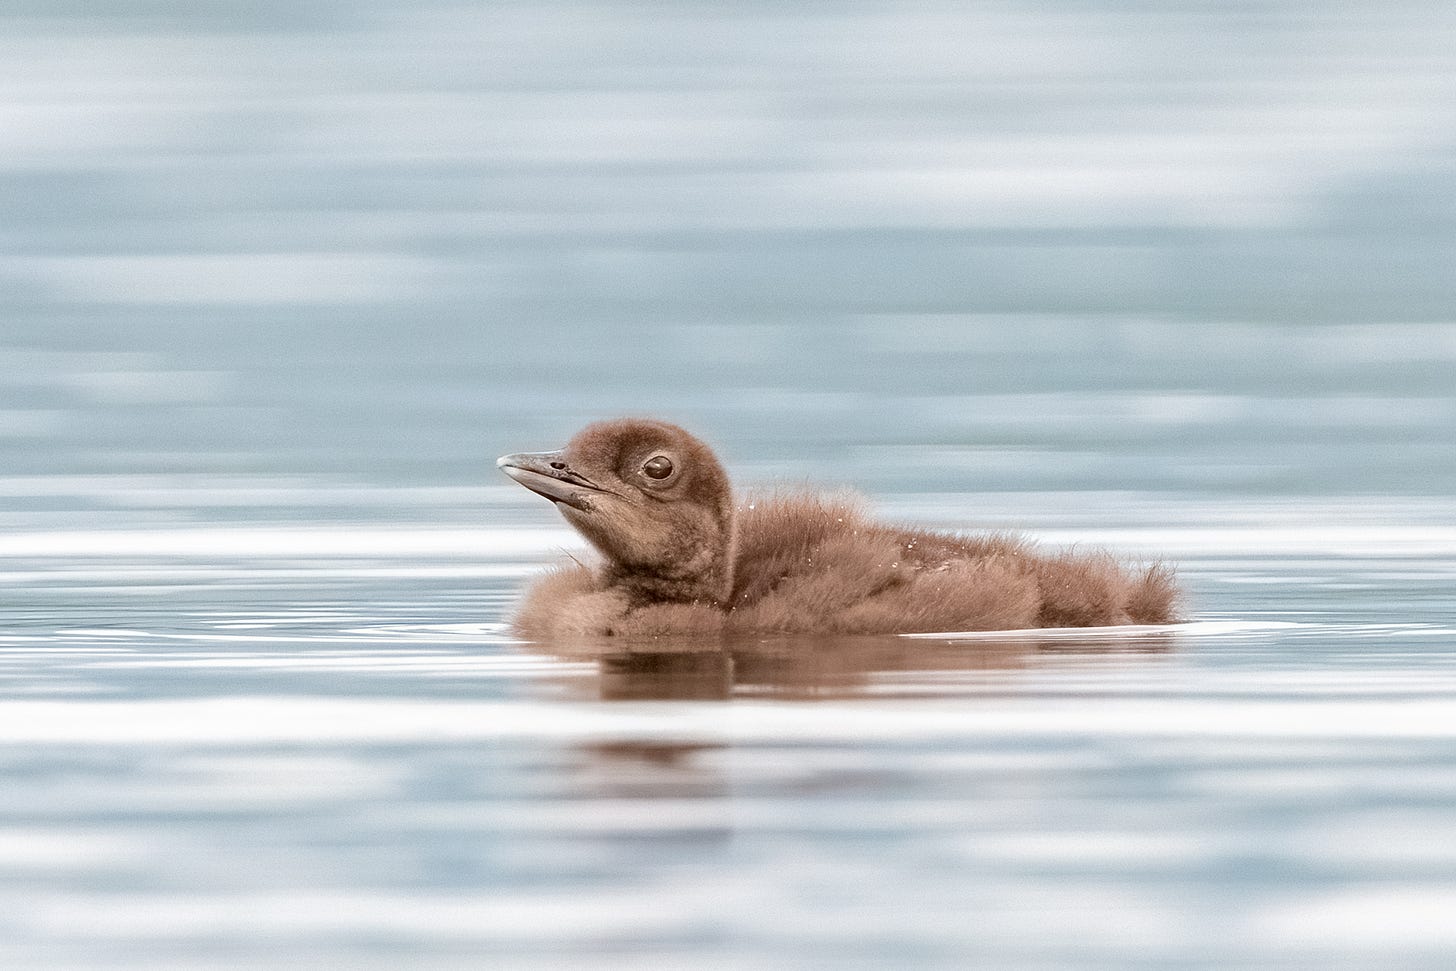
I’d dreamed of photographing a family of loons, the iconic bird seen on the Canadian one-dollar coin we call the “loonie”. But for a long time only the adults were brave enough to swim close to our family cottage in the northern Great Lakes in Ontario, Canada. It took paddling a kayak to a secluded bay nearby to find one and finally witness the care both parents give their young. Then trying to capture the moment without disturbing them.
The quiet approach and low perspective achieved from a kayak makes it worth the effort (and risk) to take along a camera. Especially if certain birds and wildlife tend to be otherwise elusive.
A few years ago, I would have had a panic attack at the thought of shooting with my expensive camera gear from a kayak. I’ve witnessed, on several occasions, an unlucky friend or family member roll right out of white water kayaks and into the lake - either while getting in or while getting out. But like most things, having the right gear can make anything possible.
Choosing a Kayak for Photography
First, a stable kayak is key. There is no shortage of styles and price range for kayaks, from relatively inexpensive plastic ones to motorized fishing kayaks costing thousands. You don’t need an expensive kayak, but find one that is comfortable. If it’s a sit-in, the opening should be wide enough to make entering and exiting the kayak easy (less risk of tipping or having to be a skilled contortionist). Fishing kayaks are particularly stable and some even have enough room to strap in a tripod if you have a bigger camera and lenses. The length and width of a kayak will help its stability, as well as the shape of the hull (a pontoon hull is the most stable).
If it’s your first time kayaking, or using a new or borrowed kayak, it’s worth practicing before taking any expensive camera equipment on board. Once you feel comfortable manoeuvring and getting a sense of its stability, you will feel more confident grabbing your camera. That said, no matter how great you are, water will inevitably make its way into the boat, so here are some tips to keep things dry.
What You Need to Keep Your Equipment Dry
Dry Bag (can cost less than £20 depending on the brand and size)
Towel (lightweight ultra-absorbent microfibre towels start at £5)
These two inexpensive items will be your allies in keeping your camera dry while paddling. Most sporting goods stores sell dry bags a variety of sizes and they are inexpensive and easy to pack. Choose a size that will fit your camera along with a small towel and lens cloth in case you get any water on it. You may want another towel or cushion to place under the dry bag to add a little padding for your gear. If you have a sit-on-top kayak, make sure you secure the dry bag using clips or straps.
Only take your camera out of the dry bag when you are ready to shoot and put it back in when you want to paddle again. Of course, there are times when you just need to adjust your position with a few strokes in which case I cheat and just cover my camera with a towel. If you want extra protection (especially from saltwater) or if it’s raining, you will want to invest in a camera rain cover as well.
Planning Your Trip
Here are a few things to think about when planning your outing by kayak.
Weather and water conditions: Check the forecast and know the tide and currents. You can still go out if there’s light rain if you have a rain cover, but avoid anything that could jeopardize your safety or make it tough to be stable enough to take photographs.
Tell Someone: always let someone know you are heading out on the water, even if it’s just a quick text. Don’t forget to let them know when you’ve returned!
PFD: no matter how calm the water or how strong a swimmer or paddler you are, this is just common sense and in some places, the law.
Seawater: while any water can be bad news, saltwater and spray are not your camera’s friend. Use a UV filter on the end of your lens for added protection and a rain cover even if it’s sunny out. If you have a waterproof camera or underwater housing, remember to rinse it well in freshwater before retrieving your memory card.
Sun protection: even if it’s cloudy.
Insurance: especially if you are using high-end gear, make sure it’s covered.
Best Time To Go
Early morning will not only give you beautiful light but also the calmest water for beautiful reflections. Birds are also more active then. Late afternoon or sunset is another great time to capture moments in sweet light.
Getting In and Out
If you are doing a shore entry, place the dry bag in the kayak first. Make sure it’s secured, using a cord or carabiner. If you are getting in from a dock, I like to leave my dry bag on the dock until I’m safely sitting and feel balanced. In either case, a second pair of hands can be helpful to either stabilize the kayak or pass over your gear. When you return, make sure your drybag is sealed and secure or already handed off before you disembark since this is another occasion when spills are possible.
The Approach
The beauty of kayaking is how quiet it is. You are much less likely to scare off any wildlife if you approach slowly. I stop fairly far away, take a few photos then try to get closer in increments. Be especially cautious when approaching a nest and stay further back. Patience is key!
What Type of Camera is Best?
In order to decide what’s best, you need to think about what you want your results to be. If you simply want to document your adventures while kayaking, a small waterproof camera or smartphone (in a waterproof case) will be sufficient. But if your goal is to get award-winning bird shots, you will need to invest in a good camera body and a long lens. The longer, the better but with that comes added weight and expense, as well as making it harder to handhold.
A telephoto zoom lens will be easier to manage and if your budget can swing it. Look for those that go up to 400mm, 500mm or even 600mm. If you have a shorter zoom lens, you can invest in a teleconverter (1.4x, 1.7x or 2.0x) that will multiply your focal length based on it’s number (i.e. a 300mm focal length becomes 600mm with a 2.0x teleconverter). A smaller sensor (either a cropped sensor or a micro four thirds) will also give you a little tighter shot.
Personally, I’ve used a Nikon DSLR with the Tamron 150-600mm lens but recently purchased a Panasonic Lumix DC-G9, a micro four thirds mirrorless camera, and a 100-400mm Leica DG Vario-Elmar lens which is much smaller and lighter. So far, I’m really impressed with the quality. My best advice is to head to a reputable camera store and try several different cameras and lenses to see how they feel, then buy the best you can afford.
Getting the Shot
Blurry images can often be caused by slight camera movements that are hard to avoid on the water. To avoid this, make sure any vibration reduction (VR) or Image Stabilization (IS) switches are turned on (found on the lens itself) and have a shutter speed higher than the focal length (eg. if you are shooting at a 400mm focal length, your shutter speed should be at least 1/400th of second).
This usually means you will need a higher ISO (leave it on Auto to make it easy) and higher ISOs mean more digital noise. I like to get rid of that in post-processing using the noise reduction slider in Adobe Lightroom or Topaz DeNoise AI. Finally, set your camera to continuous shutter and autofocus modes so it will track your subject and continue firing when you hold the shutter down. This will give you a better chance of having at least one or two sharp images in a series.
Bringing your elbows close to your body, or even leaning on your knees if you raise them up, will also keep you steady and help take the weight off your arms, that can start to shake. I also prefer to look through a viewfinder rather than the LCD display. It becomes a third point of contact for stability and keeps my arms closer to my body. As well as helping me to concentrate more on composition by really focusing on what’s in my frame.
No matter what your gear is, capturing landscapes and wildlife from just above the waterline will make your images stand out from the crowd stuck on shore. It is truly a gift to be able to spend quiet time on the water and a bonus if you can bottle up that magic in a great shot!
Vanessa Dewson is an award-winning photographer and travel writer based in Ottawa, Canada. She also teaches photography at the Ottawa School of Art and leads photography tours around the world. You can see more of her work on her website www.vanessadewson.com and Instagram https://www.instagram.com/vanessadewson.


